
WSI-INS-22018.1
Installation Guide for M3M-COM2
Housing Rosahl Solid-State Dehumidifier
Safety and Regulatory Information
For Rosahl M3M-COM2 Enclosure dehumidifier
Document No. WSI-INS-22018 V1
Manufacturer: Westside International Ltd.
Boston House, Downsview Road, Wantage, OX12 9FF. UK
enquiries@micro-dehumidifier.com www.micro-dehumidifier.com
For Correct Usage
Please read this installation guide before installing the dehumidifier. Incorrect use will invalidate the warranty.
General Safety Warnings
- This product is intended for indoor use with sealed display or storage enclosures.
- Installation requires the use of tools and basic technical skills. Not suitable for children or unqualified personnel.
- DO NOT use silicone-based sealing materialsas they will permanently damage the membrane.
- Do not touch, damage, or modify the membrane in any way.
- Only use this product with supplied or approved components. Do not substitute the power adapter or modify the membrane or housing. Do not allow the membrane to become wet.
- Do not reverse the electrical wiring (polarity), as this will permanently damage the dehumidifier membrane.
- The VRS330 VREG2 power adapter includes electronic devices sensitive to electrostatic discharge (ESD). Only qualified personnel should remove or service it.
- Do not use near rust inhibitors, vapour phase corrosion inhibitors or high-density organic gases as they will damage the membrane and reduce performance.
Electrical Safety
- Power Input: 5V DC via USB-C (minimum 15W)
- Operating Voltage: 3V DC (regulated via internal adapter)
- The integrated VRS330 VREG2 adapter includes fold-back current limiting for safe startup.
- Use only with a Class 2 power source or LPS (Limited Power Source) as defined in IEC 62368-1.
- The adapter is not a USB Power Delivery (PD) compliant sink device. Use a standard 5V USB-C power supply if issues occur.
- To disconnect power, simply remove the USB-C plug from the device or switch off the USB power adapter at the source.
Environmental Conditions
- Operating temperature: -10°C to +50°C
- Storage temperature: -20°C to +60°C
- Humidity: 10–90% RH (non-condensing)
- Altitude: Up to 2000 m
- Not evaluated for outdoor use or exposure to liquids.
Maintenance and Servicing
- This product is maintenance-free and contains no user-serviceable parts.
- Do not open, modify, or attempt to clean the membrane or circuit board.
- If the device is damaged or fails to operate, contact the supplier for support or replacement.
Disposal and Recycling
- Do not dispose of this product with regular household waste.
- Dispose of this equipment in accordance with local electronic waste regulations.
- For European customers: The WEEE Directive covers this product. Return it to your supplier or designated collection point.
Regulatory Compliance
- RoHS Declaration: Available
- REACH Declaration: Available
- Manufactured in the European Union and Japan (membrane)
- USB-C cables with ferrite chokes are recommended
Installation Guide:
The M3-COM2 housing is supplied with rubber seals, and fixing screws. It is necessary to purchase the M-3M1R dehumidifying membrane and VRS330 VREG2 power adaptor board separately.
Overview
Our membrane dehumidifiers are suitable for use with a wide range of sealed display and storage enclosures to protect sensitive and delicate equipment. They are often used for 3D filament dry boxes and storage systems like the Bambu Lab AMS and other MMS, turning them into maintenance-free electric dehumidifiers without needing desiccants or heaters.
The main components are the plastic housing, a pre-wired USB-C power adapter board, the Rosahl dehumidifying membrane.
When mounted on the outside of a sealed enclosure and connected to a USB-C power source (not supplied), the dehumidifier expels moisture through the membrane. Installation requires a hole to be made in the enclosure wall through which the moisture is expelled. See below for guidance. The dehumidification process is silent, waterless, maintenance-free and has a low energy footprint.
CAUTION: it is important not to remove or reverse the electrical connections as this may damage the membrane. The dehumidifier membrane needs a 3V DC power source. It receives this from the integrated USB-C power adapter board which reduces the voltage from a standard 15-Watt USB power supply from 5 Volts to 3 Volts.
Assembly & Mounting Instructions
You can mount the dehumidifier vertically or horizontally on the side of the enclosure but ensure the USB connection is in your chosen location.
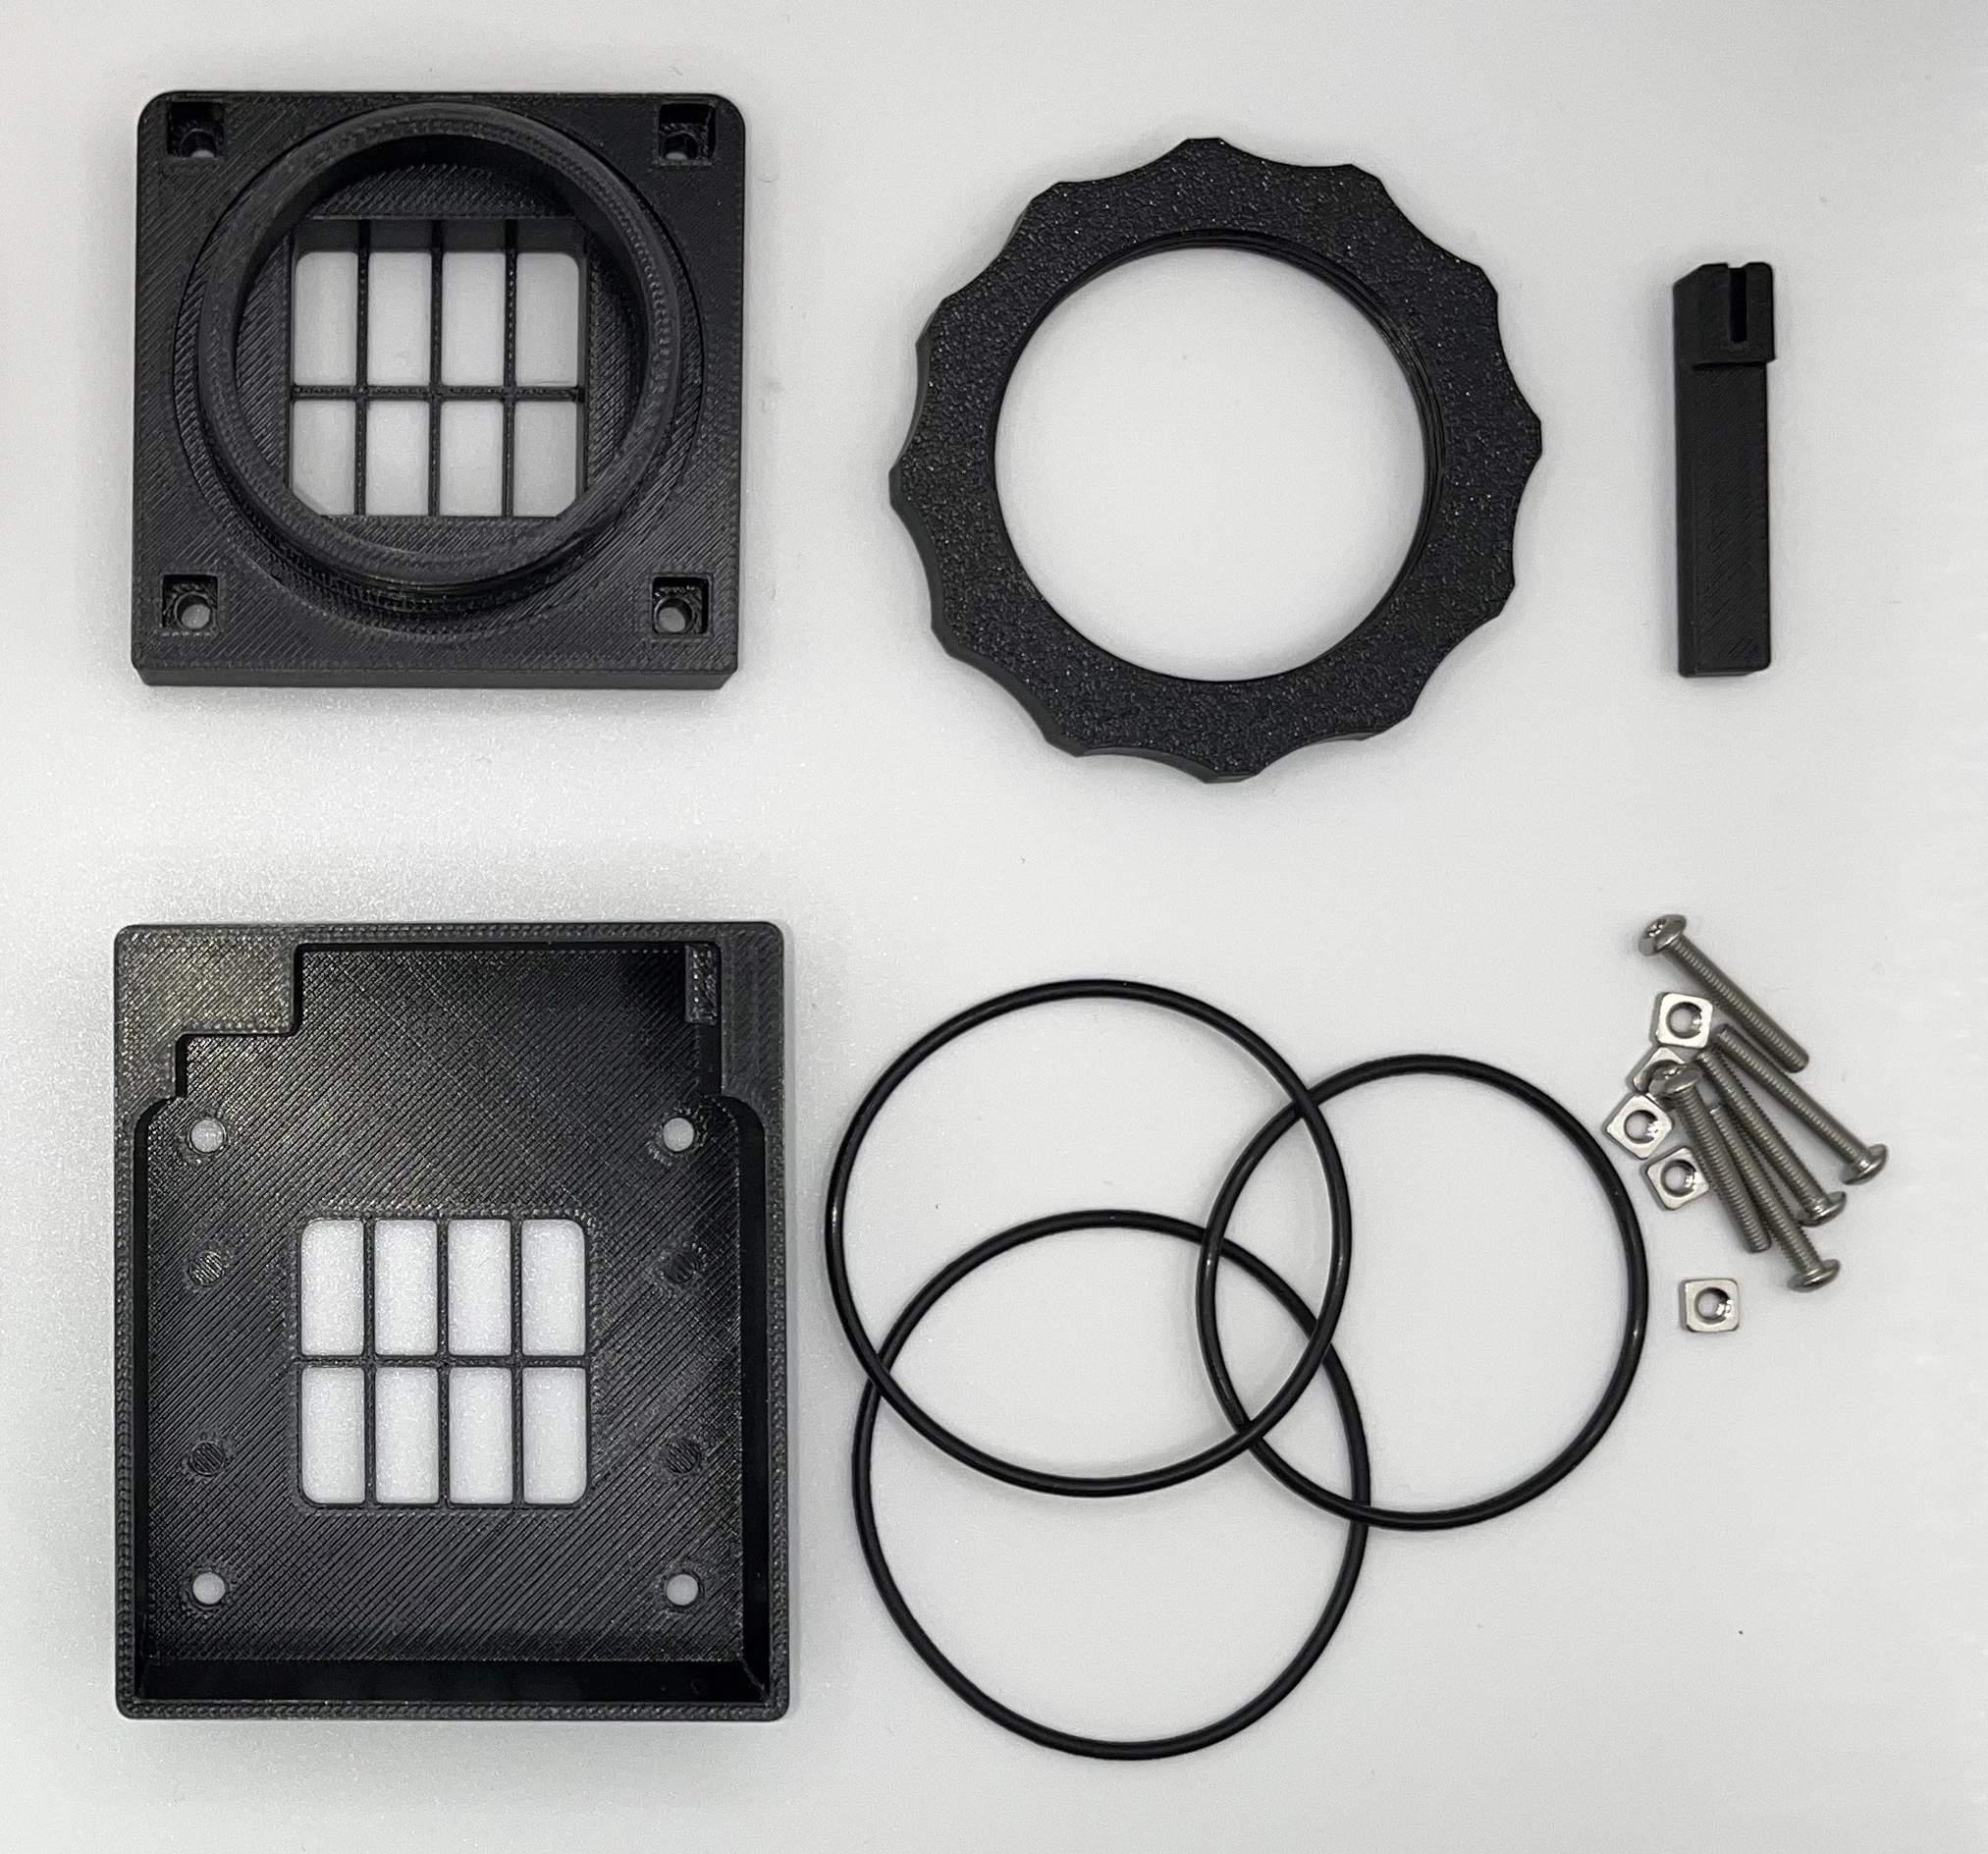
- Mounting Cover Components
The humidifier includes a four-part housing set, plus fixing template.
- Inner fixture – holds the membrane and USB-C power module
- Outer cover – secures components in place
- Threaded retaining ring holds the housing in position against the dry box
- Power adaptor retaining bar
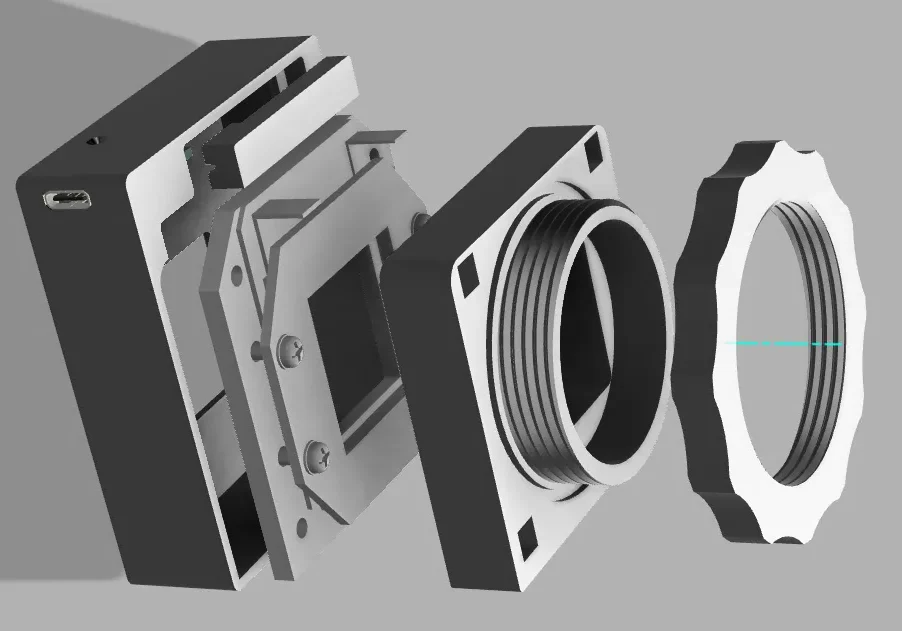
- Assembly
Caution: Do not touch the black (internal) or grey (external) membrane surfaces. Consider wearing suitable gloves to prevent damage or contamination.
Step 1: Positioning the membrane and VRS330 VREG-2 power adapter module
Slide the pre-wired VRS330 VREG-2 USB-C power adapter module into its compartment in the outer fixture. Discard the supplied membrane gasket, then lay the membrane flat into the outer fixture and connect the two cables to the membrane ensuring the correct polarity (red to positive (+) and black to negative (-). The cables should be in the centre as indicated.
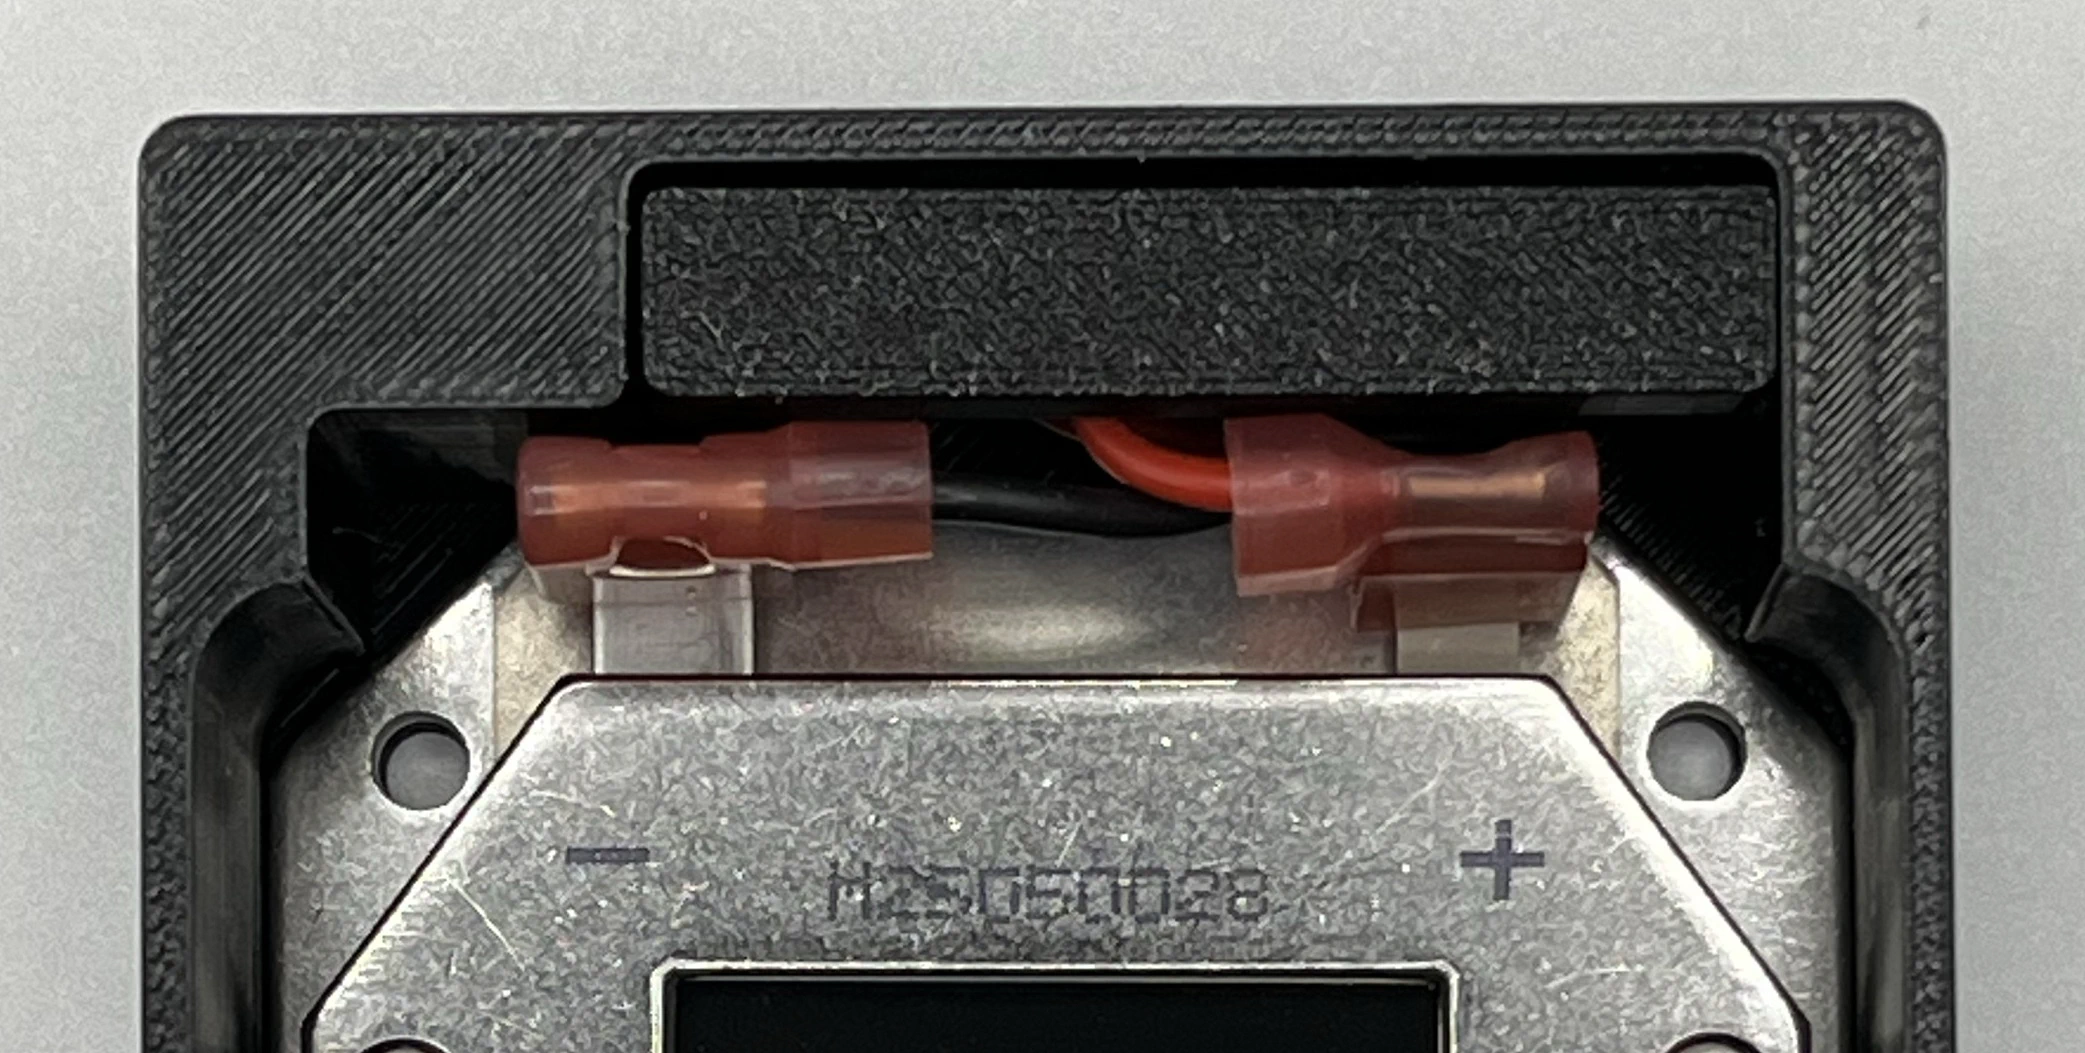
Step 2: Insert the O-ring and assemble
Insert the smallest rubber O-ring into the recess of the inner fixture and slide the inner fixture into the outer. To make this easier, leave the inner fixture with the O-ring facing up. Hold the membrane in place using light finger pressure on the cable terminals then turn it over and slide the outer fixture down over the inner fixture. Note that the two parts are keyed to ensure correct installation so arrange them in the correct orientation first.
Step 3: Secure with screws
Insert the four M3x20 screws from the front, and the M3 square nuts from the back and tighten enough to hold everything firmly in place. Check that the back of the inner and outer plastic parts sits flush, with no visible step between them.
Step 4: Attach the VREG locking bar
Adding the small VREG retaining bar keeps the VREG module securely in place when a USB-C connector is inserted later.
- Marking and Preparing the Cutout
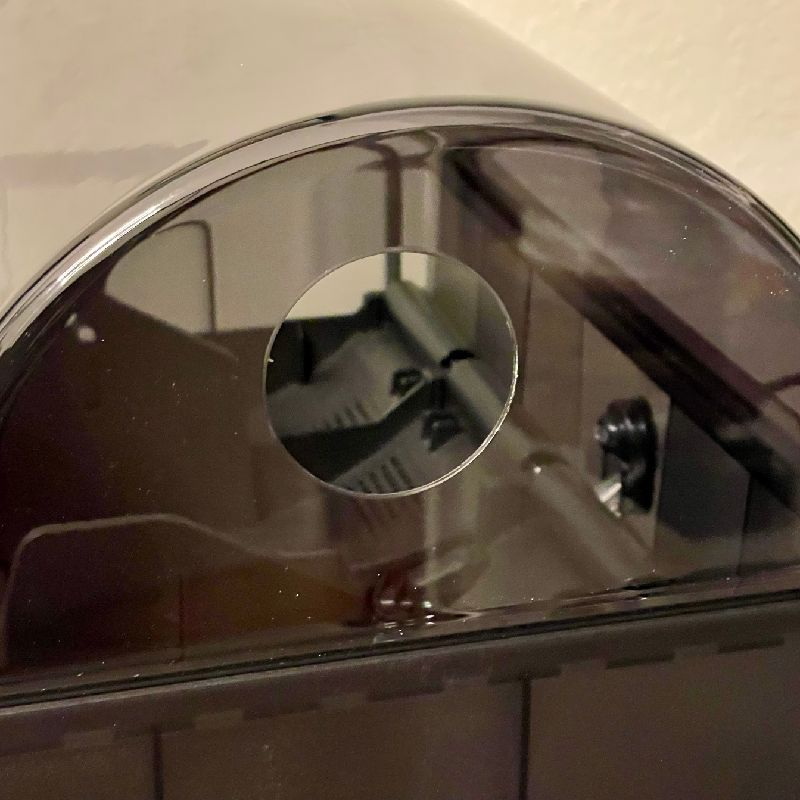
Using the supplied template, find a good place on your dry box or AMS to install the housing and mark either the centre of the hole when using a 42mm step-drill (recommended) or round hole-saw (can be risky with thin walls or brittle material), Alternatively, mark the outline of the hole while drilling a sequence of small holes around the diameter and finishing with a file.
As a suggestion, if using an AMS or similar, consider removing the cover before drilling. Otherwise use foil over the lower part and close the cover.
When the hole is completed, slide through the assembled housing. One of the larger O-rings goes into a recess around the outer thread and another larger O-ring goes into a recess of the nut. Add the nut and screw together until the O-rings fit tightly.
Finally add a USB-C cable and connect to a USB power supply/charger.
Notes
- Ensure correct insertion of all connections before final assembly.
- Always use the provided sealing rings to prevent leaks.
- Check that the gasket is compressed properly for an airtight seal.
- Avoid any air gaps in the enclosure for optimal performance.
©Westside International 2026 All rights reserved. Specifications subject to change without notice.
www.micro-dehunmidifier.com enquiries@micro-dehumidifier.com